Terraform
Notes from freeCodeCamp course1.
What is Terraform?
Terraform is an infrastructure as code tool that lets you build, change and version cloud and on-premise resources.
It's built by HashiCorp.
Info
The Terraform file will have different structure depending on the version, Terraform 0.12 and earlier, & 0.13 and later.
The following code will use 0.13 and later syntax and was tested with Terraform v1.7.0. The code demonstrated in the video and this wiki might not be same due to version updates!
Installation
- You can follow the instructions mentioned on their developers page: Install Terraform.
-
Installation on Windows:
- Download the
.exefile fromterraform.io/downloads.htmlwith appropriate architecture. Paste this file inC:\Terraform\terraform.exe - Update the Path in Environment Variables, by adding a New entry to the path:
C:\Terraform. - Check the Terraform version from cmd:
terraform -v.
- Download the
-
Installation on Mac:
- Using Homebrew by running
brew install terraform. - Check the version using:
terraform -v
- Using Homebrew by running
-
Installation on Linux:
Run following commands (Fedora):
sudo dnf install -y dnf-plugins-core
sudo dnf config-manager --add-repo https://rpm.releases.hashicorp.com/fedora/hashicorp.repo
sudo dnf -y install terraform
Check the version using:
terraform -v
Install Terraform VSCode Extension
Go to VSCode extensions tab and install Terraform extension for all autocomplete features and syntax highlighting. Make sure it's from HashiCorp.
Terraform overview
Let's create a new project and open in VSCode. All Terraform code is going to be stored in .tf extension file.
Setup provider
Create a new file, naming it whatever you want, but make sure it's extension is .tf.
-
Terraform provides many providers to interact with various cloud service providers, SaaS providers, and other APIs.
-
On a per-user basis, per-project basis, Terraform will figure out which plugins need to be installed based off of the provider configuration in your Terraform file.
We'll try creating an AWS infrastructure in Terraform file. For that we can check the AWS provider in Terraform registry.
terraform {
  required_providers {
    aws = {
      source  = "hashicorp/aws"
    }
  }
}

# Configure the AWS Provider & region
provider "aws" {
  region = "us-east-1"
}
Setup Authentication
We'll try setting up bare minimum authentication, by hard coding credentials into the file.
Warning
Hard-coding credentials into any file that is meant to versioned by Version Control System and is going to be available for everybody to read is a bad practice.
This might leak the credentials.
We can set up credentials by adding it to aws provider block:
# Configure the AWS Provider
provider "aws" {
  region = "us-east-1"
  access_key = "my-access-key"
  secret_key = "my-secret-key"
}
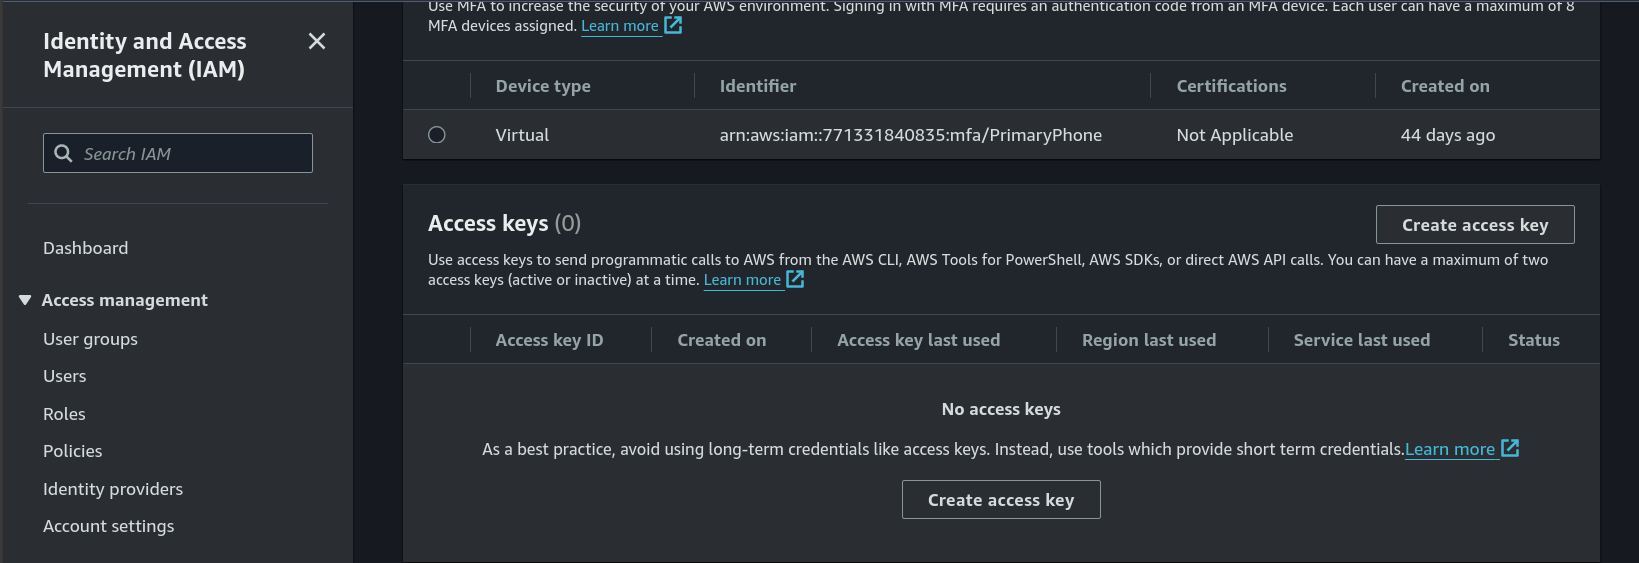
You can access them by clicking the profile name on top-right corner, and visiting Security Credentials and Create access key.
Provision a resource within AWS
Regardless of what provider you're using, whether it's to create a resource on GCP/AWS/Azure (etc.), It's going to use the same exact syntax from a Terraform side.
The basic syntax is like this:
# resource "<provider>_<resource_type>" "name" {  (1)
#   config options....
#   key = "value"
#   key2 = "value2"
# }
- Comments in Terraform files beings with a
#
We'll walk through on how to deploy an EC2 (Elastic Compute Cloud) instance withing AWS, which is basically a compute instance/virtual machine withing AWS.
Create EC2 instance via AWS console
The video go through creating AWS Instance via AWS console.
We'll use aws_instance (aws is provider, instance is resource type) as the resource to configure:
resource "aws_instance" "my-test-server" {
  ami           = "ami-0c7217cdde317cfec" # (1)!
  instance_type = "t2.micro"
}
- The AMI (Amazon Machine Image) might change in the future, so do check the AMI in the console or in Docs. Stick to free-tier eligible for the duration of this tutorial.
Open a terminal tab in your editor and run terraform init.
- This will make Terraform to look at our config (
.tffile(s)) and is going to look for all providers that we have defined. - Right now, we have only specified one provider
aws, so it's going to download the necessary plugins to interact with the AWS API.
You should see output something like this:
Terraform has been successfully initialized!
The next command terraform plan command does sort for dry run of your code. It'll kind of show you, it's going to delete any instances, if it's going to create new instances, if it's going to modify instances. This make sure you don't accidantly break your production environment or anything else.
- The output is color coded so, green means new resource, red means deletion and orange implies modification to existing resource.
Lastly, we run
Which will actually run our code, after you verify it, it will start provisioning the resources.
Modify resources
Running the terraform apply again won't create another instance, the reason being Terraform is written in declarative manner, which means we're not actually giving Terraform a bunch of steps to carry out. Instead, we're telling Terraform, what we want our infrastructure to look like.
Terraform files are basically a blueprint of the infrastructure we want to have at the end.
Try running terraform plan for a sanity check, you'll see output something like this:
terraform planalso talks to AWS and checks the state and gather information about it's state, if it's up or not.
aws_instance.my-test-server: Refreshing state... [id=i-0eae7fc4ff618a32a]

No changes. Your infrastructure matches the configuration.

Terraform has compared your real infrastructure against your configuration and found no differences, so no changes are needed.
Running terraform apply will add this to the above output:
Adding a tag
resource "aws_instance" "my-test-server" {
  ami           = "ami-0c7217cdde317cfec"
  instance_type = "t2.micro"

  tags = {
    Name = "fedora"
  }
}
And run terraform plan which should show you modification with tilde (~) marked with orange color about the tags.
aws_instance.my-test-server: Refreshing state... [id=i-0eae7fc4ff618a32a]

Terraform used the selected providers to generate the following execution plan. Resource actions are indicated with the following symbols:
  ~ update in-place

Terraform will perform the following actions:

  # aws_instance.my-test-server will be updated in-place
  ~ resource "aws_instance" "my-test-server" {
        id                                   = "i-0eae7fc4ff618a32a"
      ~ tags                                 = {
          + "Name" = "fedora"
        }
      ~ tags_all                             = {
          + "Name" = "fedora"
        }
        # (30 unchanged attributes hidden)

        # (8 unchanged blocks hidden)
    }

Plan: 0 to add, 1 to change, 0 to destroy.
And finally run terraform apply to apply the changes.
Deleting Resources
To delete the resources we can run:
With terraform destroy it's going to destroy every single resource (whole infrastructure) that was created by Terraform. If you want to destroy a single resource there are other parameters that you need to pass in to make it work.
Instead, you can remove (or comment) the specific resource you want to be destroyed.
# resource "aws_instance" "my-test-server" {
#   ami           = "ami-0c7217cdde317cfec"
#   instance_type = "t2.micro"

#   tags = {
#     Name = "fedora"
#   }
# }
And hit terraform apply which will compare the state on AWS and state declared in your Terraform file and destroy the resource.
Referencing Resources
Delete the resource you declared previously in the Terraform file, my-test-server and run terraform apply.
Let's explore how to create a VPC (Virtual Private Network) and subnet within that VPC. A VPC is a private, isolate network, within your AWS environment. Each one of the VPC by default is going to be isolated from one another.
We'll use aws_vpc resource.
- The above block implies, for our VPC, the
10.0.0.0/16is going to be the network that's going to be the network that's going to be used for that VPC.
We'll also want to create a subnet withing that VPC. For that we'll use aws_subnet resource.
resource "aws_subnet" "subnet-1" {
  vpc_id     = aws_vpc.my-test-vpc.id
  cidr_block = "10.0.1.0/24" # (1)!

  tags = {
    Name = "prod-subnet"
  }
}
-
Make sure
cidr_blockof subnet falls within VPC'scidr_block -
To reference the
vpc_idwe use the resourceidproperty which is defined for every resource, of the VPC we just createdmy-test-vpc.
Hit terraform apply and deploy the changes.
!!!note Terraform does not care about the order you define.
Due to declarative nature of Terraform VPC **doesn't need** to declared before the subnet. Terraform will take care of what needs to get created first.

Although, there are certain instances where it can't. In those case you can look at documentation to figure out a workaround.
Terraform files
Let's talk about various files Terraform generates:
.
├── .terraform/
├── .terraform.loc.hcl
├── main.tf
├── terraform.tfstate
└── terraform.tfstate.backup
- When we did
terraform initto initialize any plugins, it creates the.terraform/directory and install all the required plugins in this directory. If you delete this dir, you can get it back just by runningterraform init. - The
terraform.tfstaterepresents whole state of Terraform. Anytime we create a resource withing any of the cloud provider, we need a way for Terraform to keep a track of what is created. This file is very important, if this gets deleted, you'll break Terraform, causing a mismatched state between what's deployed and what's declared..
Practice Project
In this section we'll create a new EC2 instance, assign it a public IP address, so that we can SSH into it a
- Create a VPC
-
Create Internet Gateway
So that we can send traffic out to the internet, 'cause we want to be able to assign a public IP address to this server so that anybody in the world can reach to it.
-
Create custom route table
- Create a subnet
- Associate subnet with Route table
- Create security group to allow port
22,80&443. - Create a network interface with an IP in the subnet that was created in step 4.
- Assign an elastic IP to the network interface created in step 7.
- Create Fedora server and install/enable apache2
The first thing we need to do is to create a key pair within AWS. A key pair, consisting of a public key and a private key, is a set of security credentials that you use to prove your identity when connecting to an EC2 instance.EC2 stores the public key on your instance, and you store private key.
Checkout this documentation on how to create a key-pair.
Step 1: Create a VPC
Step 2: Create a gateway
Step 3: Create custom route table
resource "aws_route_table" "prod-route-table" {
vpc_id = aws_vpc.prod-vpc.id
route {
# cidr_block = "10.0.1.0/24" (1)
cidr_block = "0.0.0.0/0" # (2)!
gateway_id = aws_internet_gateway.gw.id
}
route {
ipv6_cidr_block = "::/0"
gateway_id = aws_internet_gateway.gw.id
}
tags = {
Name = "prod"
}
}
- For the subnet
10.0.1.0/24we're going to send it to the internet gateway. - We set up a default route, i.e., all traffic is going to get sent to the internet gateway.
Step 4: Create a subnet
resource "aws_subnet" "subnet-1" {
vpc_id = aws_vpc.prod-vpc.id
cidr_block = "10.0.1.0/24"
availability_zone = "us-east-1a"
tags = {
Name = "prod-subnet"
}
}
Step 5: Associate subnet with Route table
For this we'll use another resource type within Terraform called route table association
resource "aws_route_table_association" "a" {
subnet_id = aws_subnet.subnet-1.id
route_table_id = aws_route_table.prod-route-table.id
}
Step 6: Create a security group
resource "aws_security_group" "allow_web" {
name = "allow_web_traffic"
description = "Allow TLS inbound traffic and all outbound traffic"
vpc_id = aws_vpc.prod-vpc.id
ingress {
description = "HTTPS"
from_port = 443 # (1)!
to_port = 443
protocol = "tcp"
cidr_blocks = ["0.0.0.0/0"] # (2)!
}
ingress {
description = "HTTP"
from_port = 80
to_port = 80
protocol = "tcp"
cidr_blocks = ["0.0.0.0/0"]
}
ingress {
description = "SSH"
from_port = 22
to_port = 22
protocol = "tcp"
cidr_blocks = ["0.0.0.0/0"]
}
egress {
from_port = 0 # (3)!
to_port = 0
protocol = "-1" # (4)!
cidr_blocks = ["0.0.0.0/0"]
}
tags = {
Name = "allow_web"
}
}
from_portandto_portallows us to specify port in specific range.- You can even specify a specific IP address, say you're work-computer so that only that can access it.
- We're allowing all ports in the egress direction.
-1means any protocol
Step 7: Create a Network Interface
resource "aws_network_interface" "web-server-nic" {
subnet_id = aws_subnet.subnet-1.id
private_ips = ["10.0.1.50"] # (1)!
security_groups = [aws_security_group.allow_web.id] # (2)!
}
- What IP we need to give the server. We can choose any IP from the subnet except for those that AWS reserves a couple of addresses.
- Pass in a list of security group.
Step 8: Assign Elastic IP to NIC
resource "aws_eip" "one" {
domain = "vpc"
network_interface = aws_network_interface.web-server-nic.id
associate_with_private_ip = "10.0.1.50" # (1)!
depends_on = [aws_internet_gateway.gw] # (2)!
}
- Reference the
private_ipswe assigned to our NIC, the IP we gave to the server. - Take a look at documentation for
aws_eip. We can usedepends_onto set an explicit dependency on the Internet Gateway. We want to reference the whole object, so noidhere.
Deploying an elastic IP requires the Internet Gateway to be deployed first before the actual elastic IP gets deployed.
Step 9: Create Fedora Server and install apache2
resource "aws_instance" "web-server-instance" {
ami = "ami-081f29ca9a2a16cec"
instance_type = "t2.micro"
availability_zone = "us-east-1a"
key_name = "main-key"
# another block
network_interface {
device_index = 0
network_interface_id = aws_network_interface.web-server-nic.id
}
user_data = <<-EOF
#!/bin/bash
sudo dnf update -y
sudo dnf install httpd -y
sudo systemctl enable httpd.service
sudo systemctl start httpd.service
sudo bash -c 'echo you very first web server > /var/www/html/index.html'
EOF
tags = {
Name = "fedora-server"
}
}
Terraform Commands
You can just hit terraform, and it will list all terraform command available to execute.
We'll take a look at terraform state command.
If you want to take a detailed look use show sub-command passing it the resource id shown in state list output:
Terraform Output
What we could get Terraform to automatically print resources properties out when we run a terraform apply, i.e, when the resource is created?
We can try this let's say when we want to extract the public IP, that's going to get assigned to an elastic IP or an EC2 instance that gets created.
- You can get the property you want to show from
terraform state showsub-command.
Next time, when you'll run terraform apply it will print the property for you, instead of you having to manually go and check it either via AWS Console or via Terraform state command.
use --auto-approve with terraform apply to automatically approve the changes
Use carefully though!
If you do add output but don't want to run terraform apply, because it can potentially make changes to your network. In production environment, you don't want to accidentally deploy or delete something, but just to see what the output is.
In that case, you should use:
Which refreshes all of your state, and it'll run the outputs. So, you can verify them without actually having to apply anything.
Target Resources
Maybe you just wanted to delete an individual resource or if you're trying to roll out with a deployment to do staged deployments, where only certain resources are to be deployed one day. And then the next day, another set of resources.
We can individually target the resources in our config by passing a -target flag.
Let's say we want to destroy the web server, we can run:
and to redeploy it:
Variables
Terraform allows us to use variables so that we can reuse values throughout our code without having to repeat ourselves.
Let's say we want to take cidr_block definition for subnet-1 and store it in a variable.
resource "aws_subnet" "subnet-1" {
vpc_id = aws_vpc.prod-vpc.id
cidr_block = "10.0.1.0/24"
availability_zone = "us-east-1a"
tags = {
Name = "prod-subnet"
}
}
You can do it like this:
variable "subnet_prefix" { # (1)!
description = "cidr block for the subnet"
default = "10.0.66.0/24" # (2)!
type = string # (3)!
}
- Either we can leave this block empty or provide optional values, which are
description,default&type. - If user doesn't specify a default value, use the default one.
- We can type constrain it, so when a user enters in a value, we can make sure that they enter the proper type for this. Take a look at Types and Values
To reference it we use it something like this:
resource "aws_subnet" "subnet-1" {
vpc_id = aws_vpc.prod-vpc.id
cidr_block = var.subnet_prefix
availability_zone = "us-east-1a"
tags = {
Name = "prod-subnet"
}
}
When we hit terraform apply, Terraform will ask you to enter the value, since the var has not been assigned a value.
- Another way we can assign it a value is using command line arguments.
- The best way would be to use separate file to assign a variable.
Terraform looks for terraform.tfvars for variable assignments. We can keep our vars in this file as:
And when you run terraform apply, it won't ask you for the variable assignment and instead take it from this file.
Multiple .tfvars files?
We can pass in the filename to look into for vars like this:
Using list as a variable.
Let's say our terraform.tfvars looks like this:
and Terraform file like:
# provider config...
resource "aws_vpc" "prod-vpc" {
  cidr_block = "10.0.0.0/16"
  tags = {
    Name = "production"
  }
}
variable "subnet_prefix" {
description = "cidr block for the subnet"
}
resource "aws_subnet" "subnet-1" {
vpc_id = aws_vpc.prod-vpc.id
cidr_block = var.subnet_prefix[0]
availability_zone = "us-east-1a"
tags = {
Name = "prod-subnet-1"
}
}
resource "aws_subnet" "subnet-2" {
vpc_id = aws_vpc.prod-vpc.id
cidr_block = var.subnet_prefix[1]
availability_zone = "us-east-1a"
tags = {
Name = "prod-subnet-2"
}
}
Using objects within variables
We'll change the way we assign the tag. Instead, of assigning the tag or hard coding it, we want to have a variable/object that has two properties, cidr_block and name property.
In our terraform.tfvars:
subnet_prefix = [
  { cidr_block = "10.0.1.0/24", name = "prod-subnet"},
  { cidr_block = "10.0.2.0/24", name = "dev_subnet"}
]
And so our Terraform file will look something like:
```terraform hl_lines="16 21 27 32"
provider config...
resource "aws_vpc" "prod-vpc" { cidr_block = "10.0.0.0/16" tags = { Name = "production" } }
variable "subnet_prefix" {
description = "cidr block for the subnet"
}
resource "aws_subnet" "subnet-1" { vpc_id = aws_vpc.prod-vpc.id cidr_block = var.subnet_prefix[0].cidr_block
availability_zone = "us-east-1a"
tags = { Name = var.subnet_prefix[0].name } }
resource "aws_subnet" "subnet-2" { vpc_id = aws_vpc.prod-vpc.id cidr_block = var.subnet_prefix[1].cidr_block
availability_zone = "us-east-1a"
tags = { Name = var.subnet_prefix[1].name } } ```AKIA3HFXV3NBTRFZRZOI
-
Created on January 21, 2024. ↩